[Home] - [Platform Access] - [Admin] - [DDS Config Manager] - [Bulletin: Bulletin Management and Custom Bulletin Editor] - [User Interface and Available Tools] - [Static Layers] -[Observations] - [Forecast Models] - [Events]
The Static Layers menu is the third action button in the Toolbar and provides access to all time-independent datasets available in the system.
When the user clicks the button, a window opens displaying filters at the top and the list of layers at the bottom.
Filters available are: coverage filter, hazard picker, and layer search.


Filters
- Coverage Filter allows the user to select layers based on a specific geographical extent. By default, all coverages are selected.
The list of available coverages may vary depending on the user profile. The image below shows an example of a list of extents.

- Hazard Picker allows the user to display only layers related to one or more hazards. By default, all hazards are selected.
The lists of hazards may vary depending on the users profile.
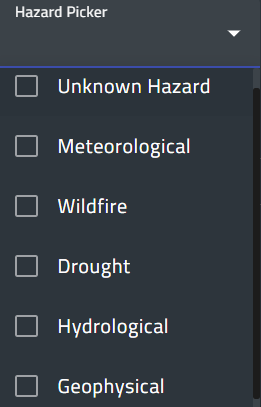
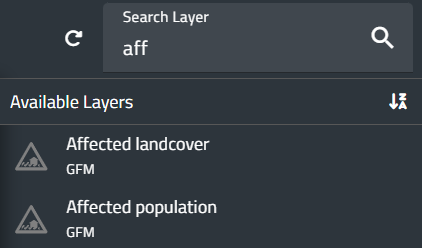
- Search Layer allows the user to search for a layer by typing its name or part of it. This filter works only within the tags currently selected.

Layer list
The bottom section of the window displays:
- On the left, the list of selectable tags.
- On the right, the layers associated with each tag.
Static data may be provided either as individual layers or as static layer groups.
A layer group bundles several related layers under a single entry; users can switch between the layers in the group through a drop-down menu available in the Properties window.
The table below shows the available static layers. However, the list may vary depending on the user profile.
More information about each layer can be accessed by clicking on its name.
| Tag | Layer |
| Administrative Units | Global Administrative Boundaries |
| Admin Unit | |
| Coastline | |
| Parishes | |
| Country Area | |
| Districts | |
| Departments | |
| Society and Population | Land |
| Settlements | |
| Population | |
| Geophysical Data | Geology and Soils |
| Morphology | |
| Elevation/DEM | |
| Infrastructure | Road Network |
| Transport | |
| Buildings and Facilities | |
| Natural Resources | Wetlands Areas |
| Natural Features | |
| Hydrographic Data | River Network (Global) |
| Rivers | |
| Water Bodies | |
| Basins and Watersheds | |
| Water Infrastructure | |
| Waterfalls | |
| Weather and Climate | Forecast and Cyclone Tracking |
| Climate | |
| Stations | |
| Wind | |
| Natural Hazards | Flood: GAR Flood Hazard (Layer Group) CEMS Global Flood Hazard Flood Zones |
| Landslide | |
| Soil Erosion | |
| Exposures and Risk | GHS Population Density (2015) |
| Global Human Settlements (GHS) | |
| World Population (GPV v4 - 2015) | |
| Transportation network: Global Roads Network (ESRI) Global Railroads Network |
|
| Dams | |
| Health facilities | |
| Power Plants | |
| Airports | |
| Physical exposition to flood |

Loaded layers
When a static layer is loaded, it is automatically added to both the Control Map and the Layer List (top left corner of the screen).
While the layer is visible on the Map, the Layer List provides additional information and access to specific functions.


Layer ordering
To the left of the layer name in the Layer List, an icon with six dots allows users to drag the layer up or down.
The order of layers in the list determines their display order on the map: the topmost layer in the list appears on top of the map.
¶ Available actions
To the right of the layer name in the Layer List, several buttons are available:
- Hide layer: temporarily hides the layer without deleting it from the list. Clicking the same button again restores its visibility on the map.
- Remove layer (the trash-can icon): removes the layer from the list.
- Layer details (i icon): opens a window displaying metadata and additional information.
- Zoom to Layer: sets the zoom back to the default extent for the selected layer.
- Legend: opens a pop-up window showing the legend for the selected layer.
The image below shows an example of the legend for the Global Human Settlements layer.

- Properties: opens a window with the properties of the selected layer.
For static layer groups, this window also includes a drop-down menu allowing the user to choose which layer within the group to display on the map.
The image below shows an example of the drop-down menu for the CEMS Global Flood Hazard menu.

- Expand: reveals additional buttons:
1. Slider to adjust the transparency of the layer.
2. Metadata to display the metadata file associated with the layer.

Adding new Static Layer
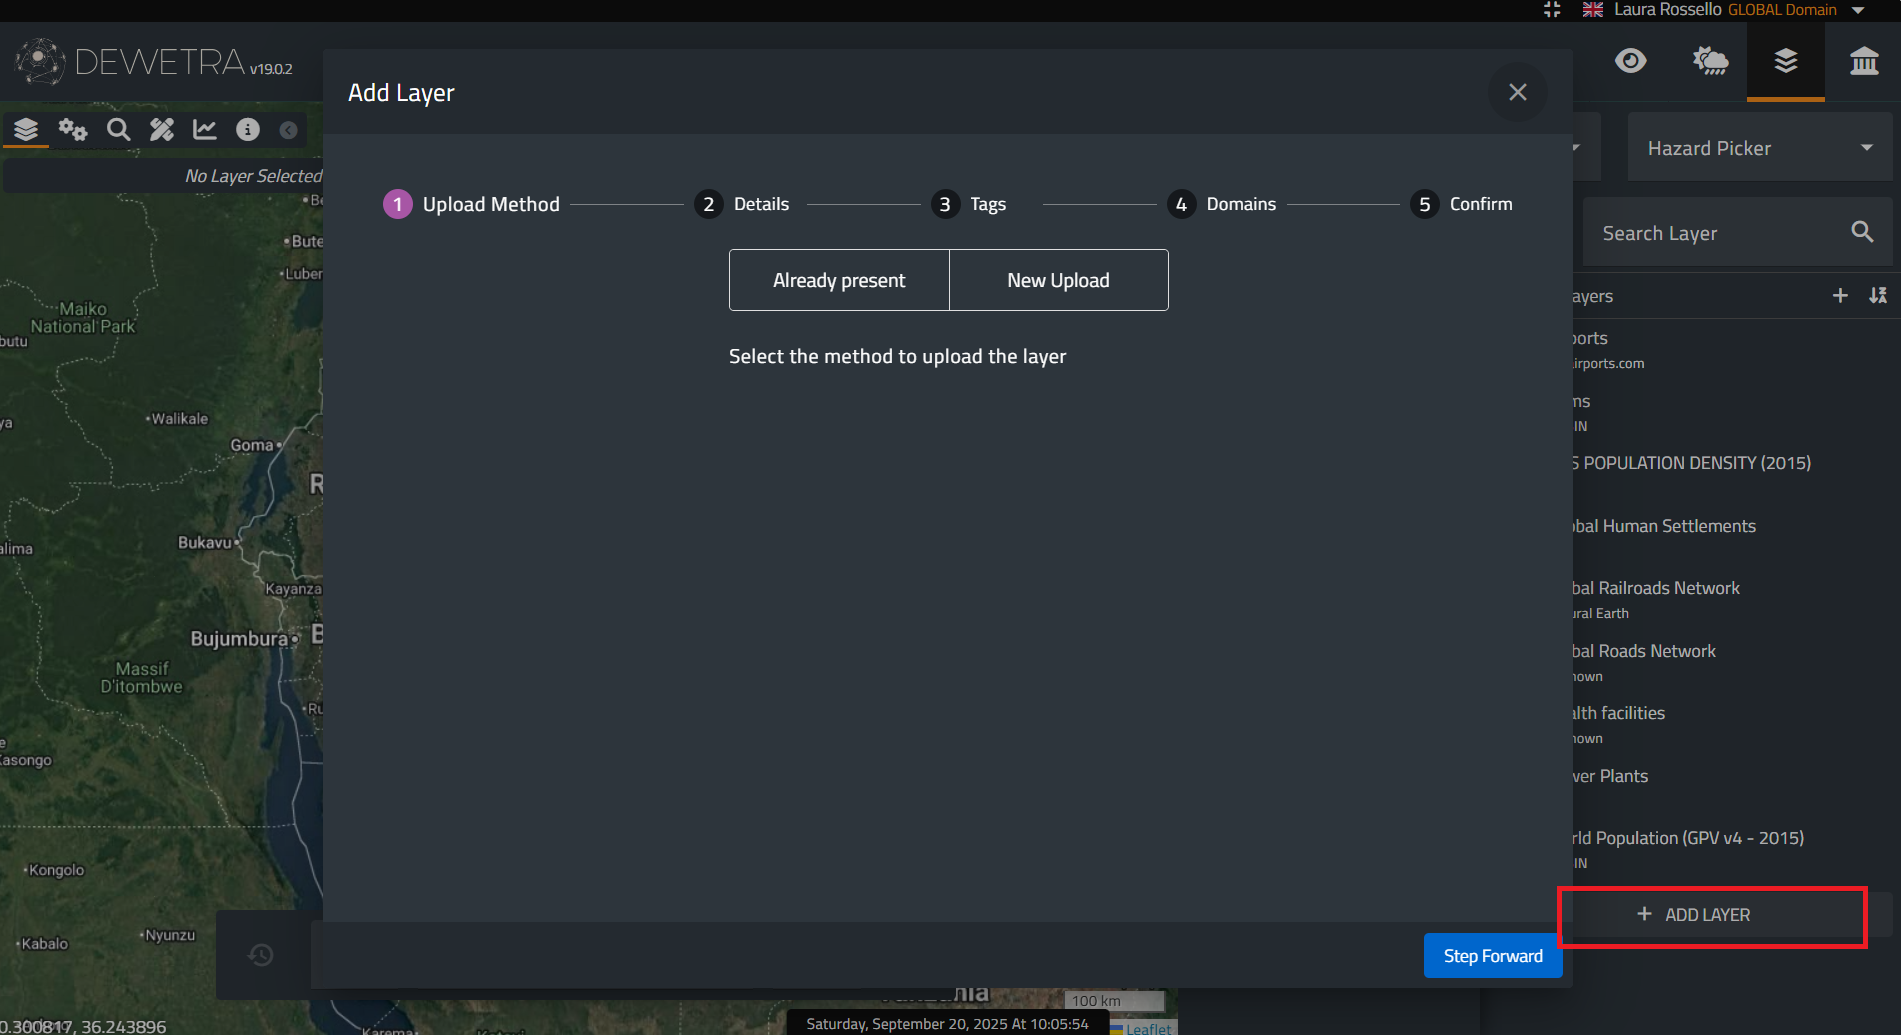
At the bottom of the Static Layers list, an additional function allows authorized users to upload new static layers. Clicking the button, a window opens with a guided workflow for adding a new dataset to the platform, as shown in the figure below.
¶ Upload Format
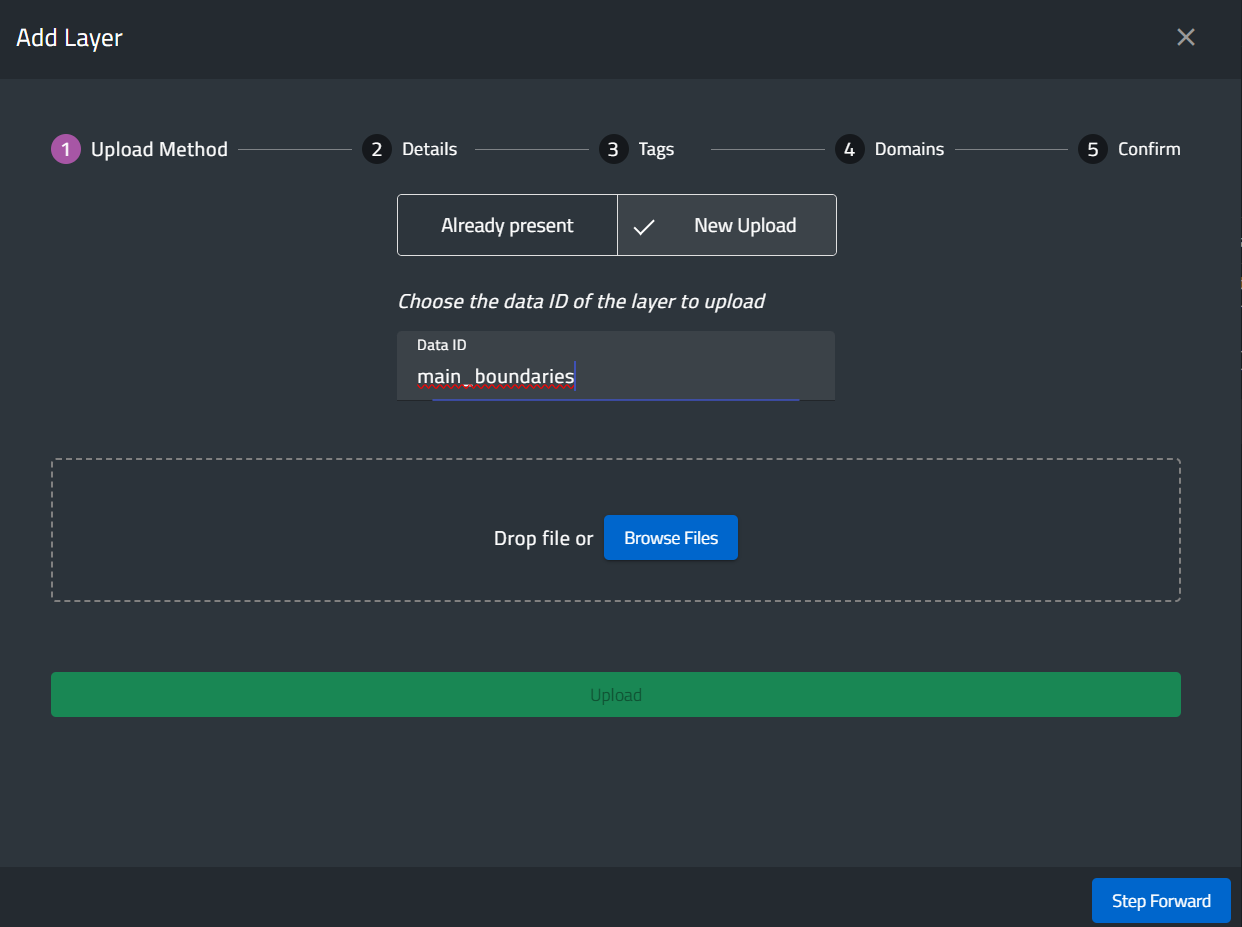
The New Upload feature allows users to add a new layer in GeoPackage format for vector data or in GeoTIFF format for raster data.
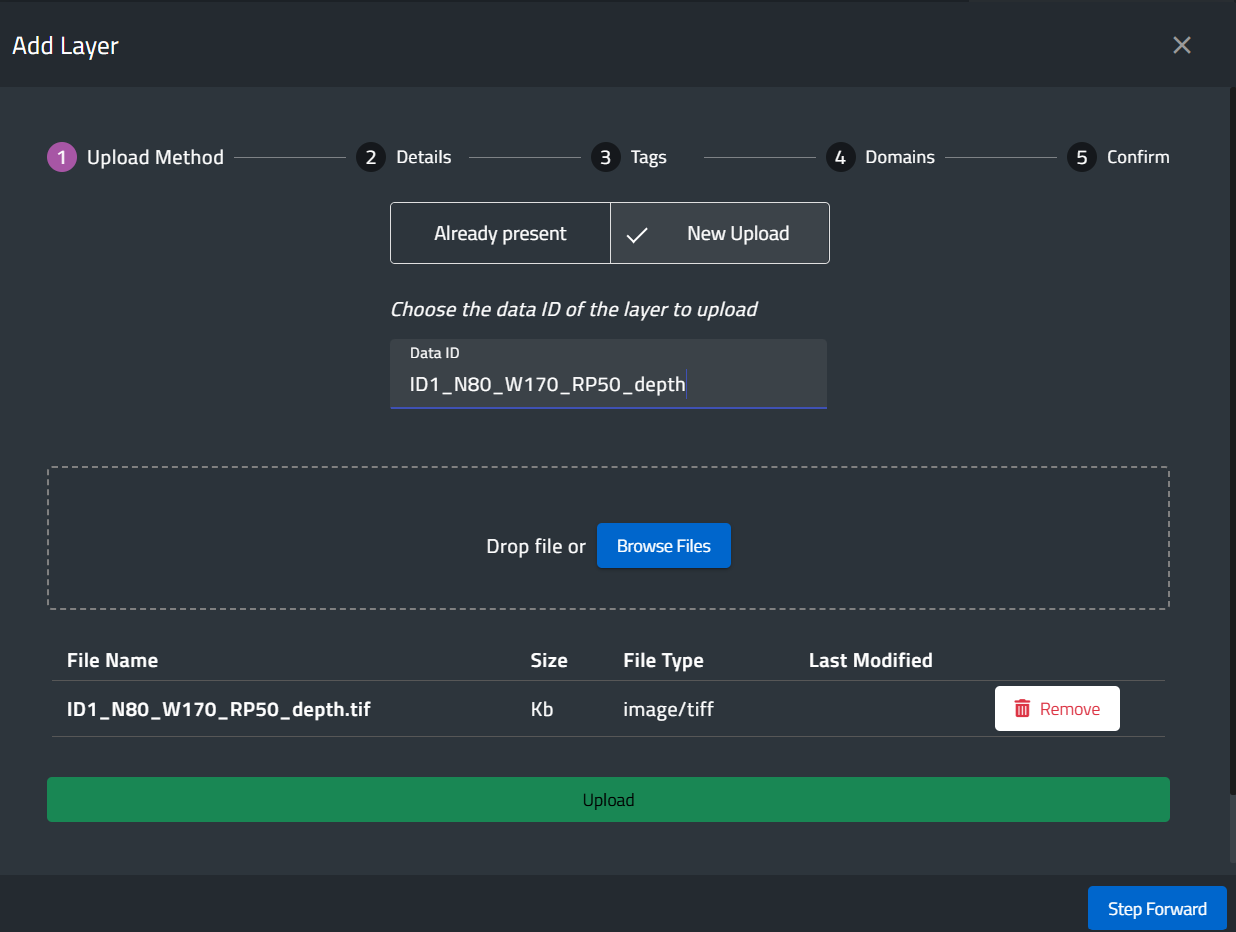
Users must specify a Data ID which becomes the ID in the myDEWETRA database. Then, a window will appear, as in the image below:
¶ File Upload
Users can drag and drop files or browse their local disk.
Once the files are selected, pressing “Upload” imports them into the system.
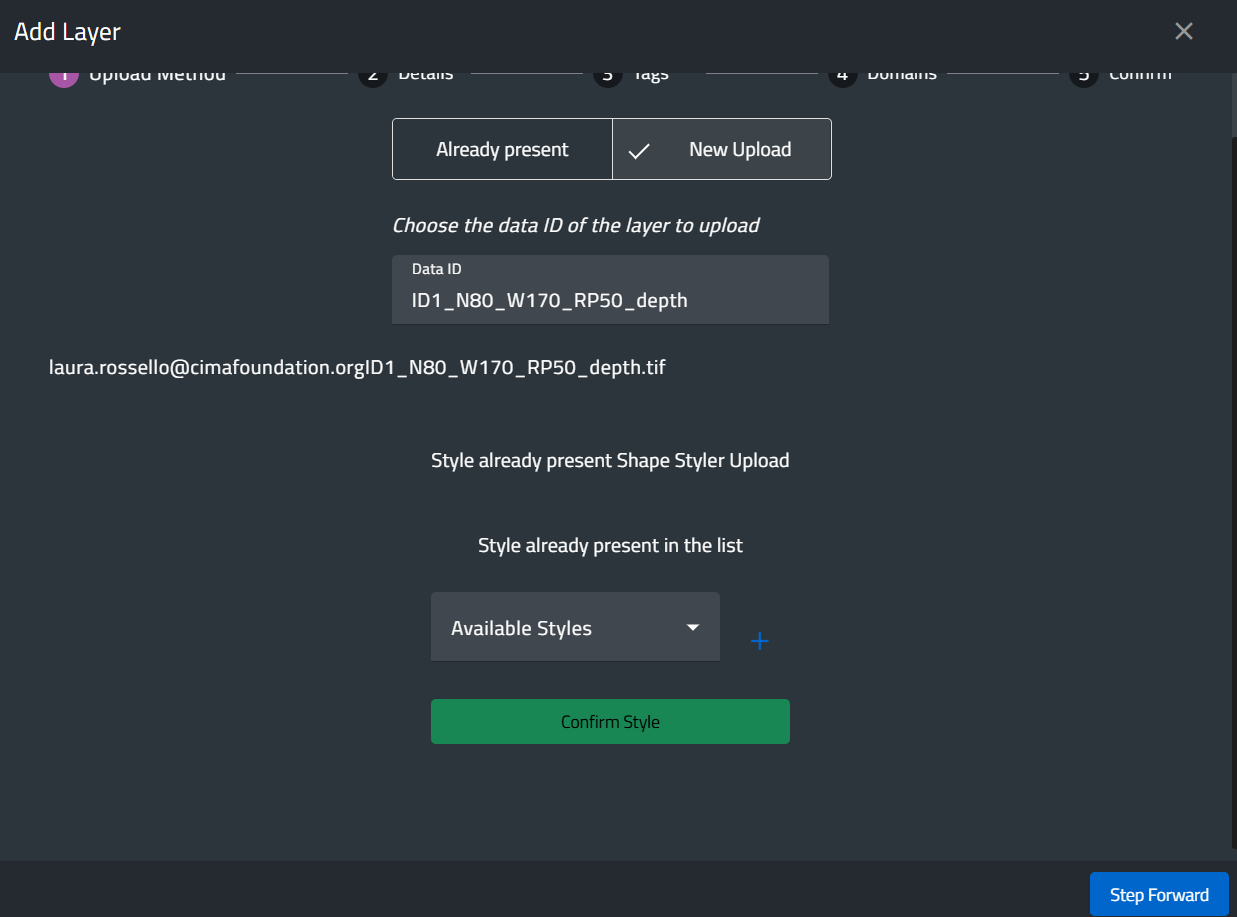
¶ Style Assignment
After uploading the data, users can select an existing style for the layer or upload a new style in SLD format.

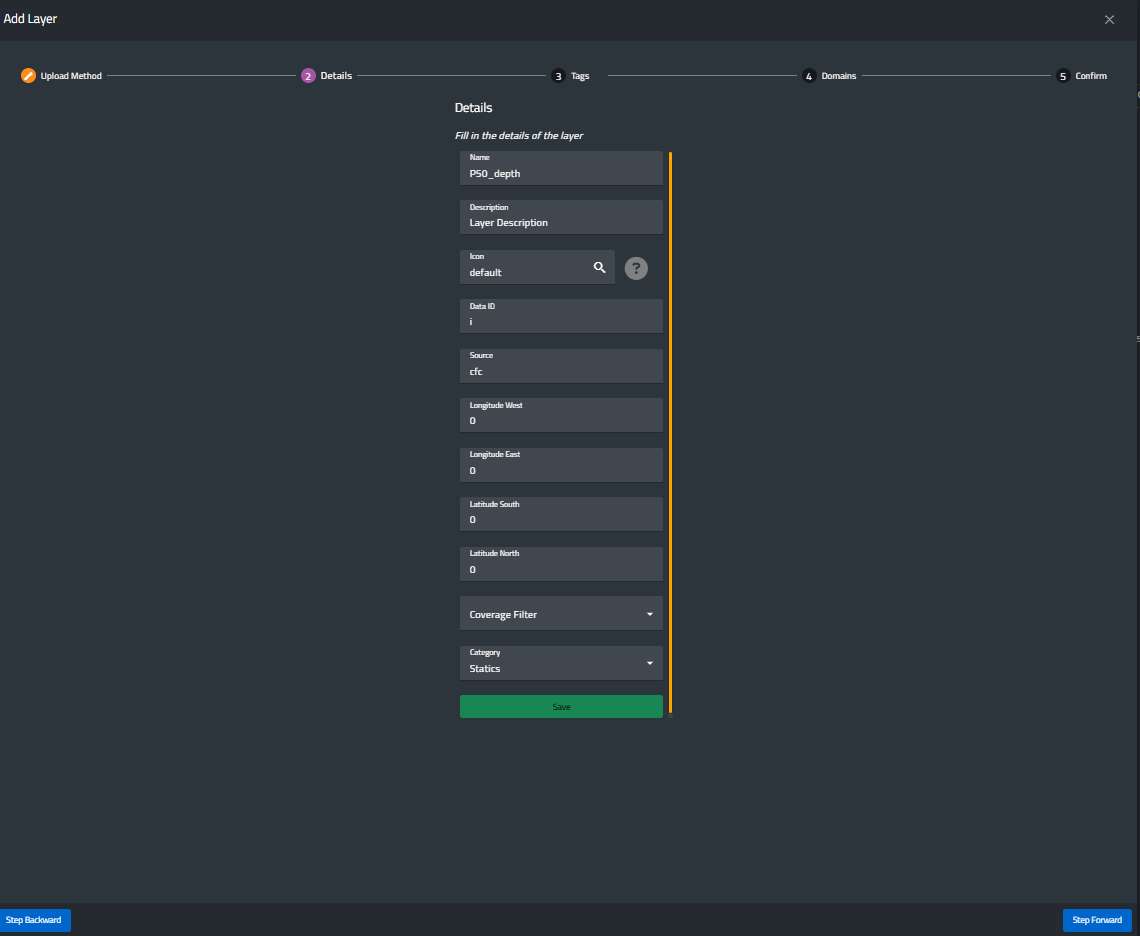
Layer Characteristics
In the next step, users can define the characteristics of the layer, including
- name
- description
- icon
- source
- geographical extent
- coverage filter
- category.
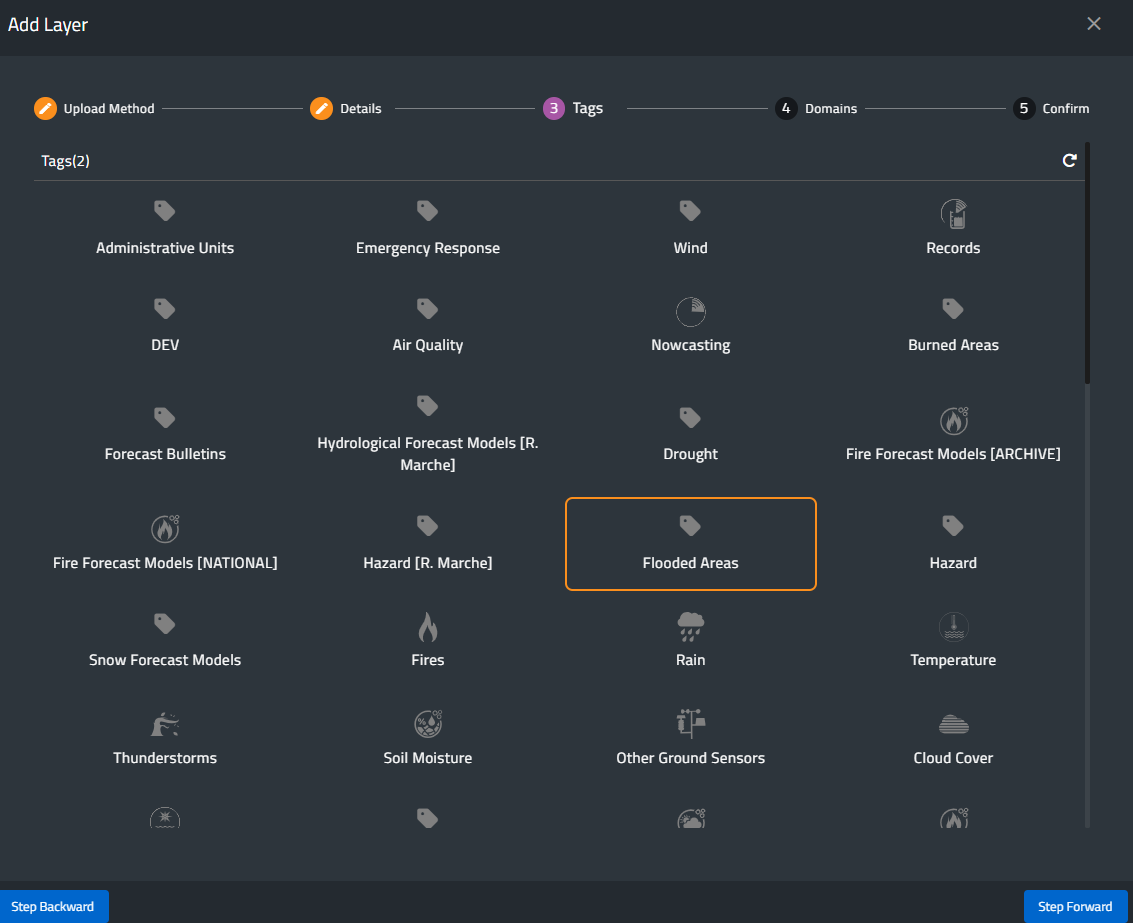
¶ Tag Assignment
Users must now assign one or more existing tags to the layer.
Tags determine where the layer is visible within the Static Layers menu.

Domain Assignment
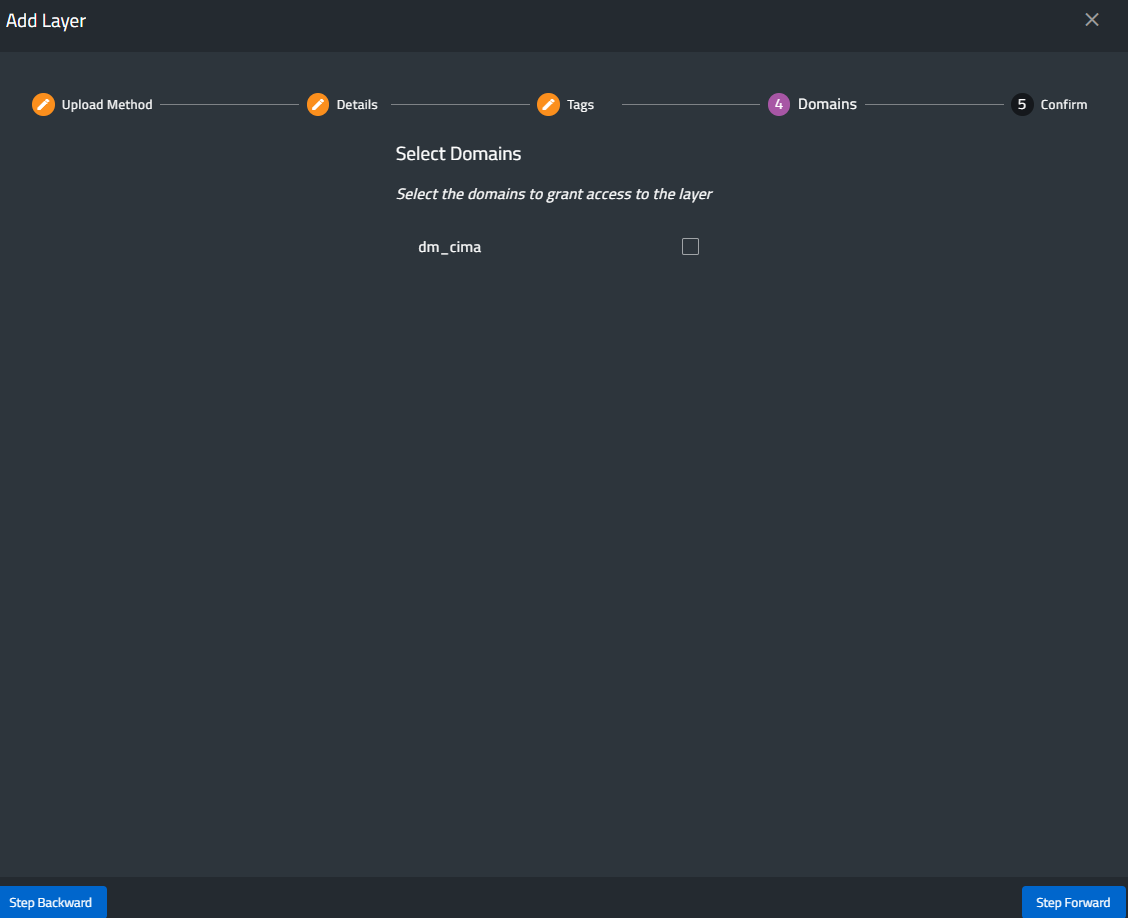
The layer must be assigned to one or more domains.
Domains are strictly linked to user permissions: users can upload layers only within the domains they are authorized to manage.
¶ Final confirmation
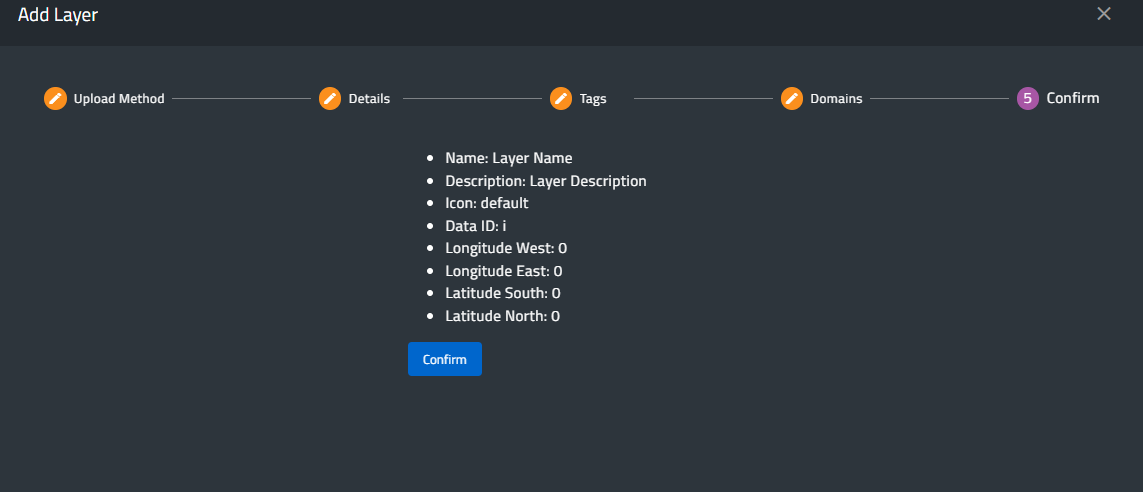
A summary window displays all details of the new layer,
Pressing Confirm completes the upload and adds the layer to the Static Layers menu.

Managing Uploaded Layers
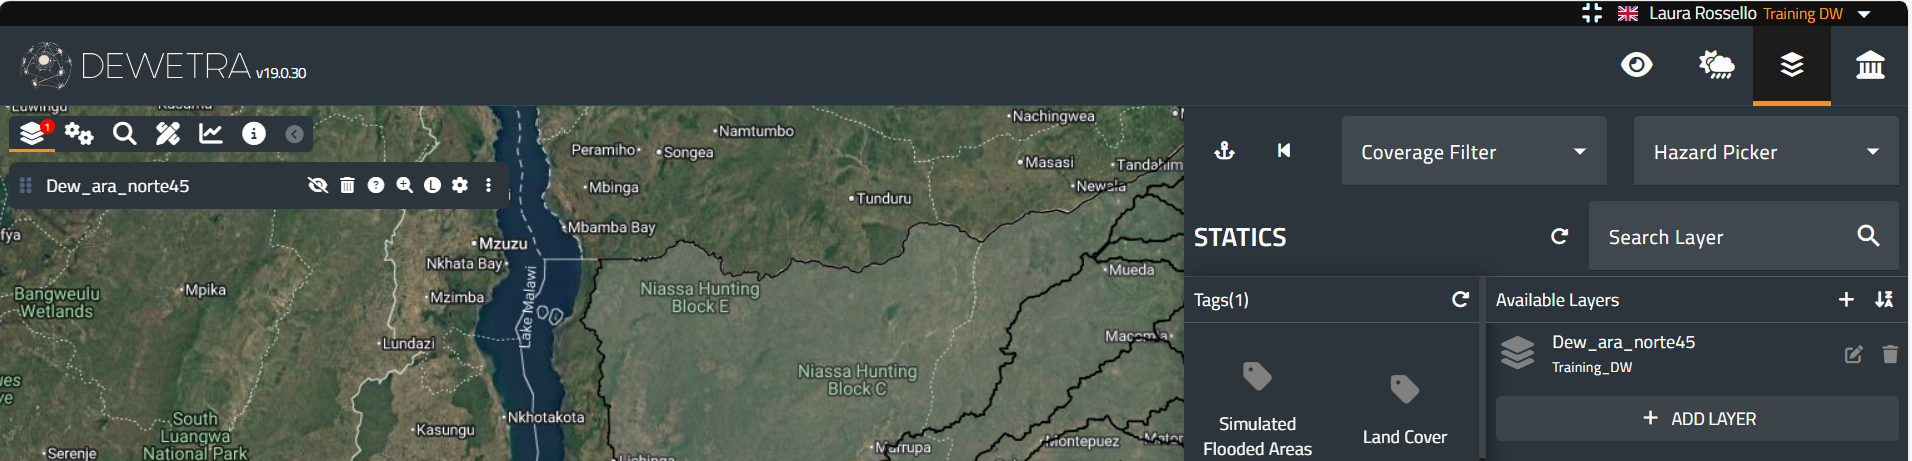
Once a new layer has been uploaded into the platform, the user who performed the upload can modify it or remove it from the menu.
These functions are available only to the user who uploaded the layer.
[Home] - [Access to the platform] - [User Interface] - [Observations] - [Forecast Models] - [Static Layers] - [Events]